1

Your cart is empty.

The #1 Virgin Human Hair Company

15 Sep '18

How To Cure An Itchy Scalp While Wearing A Sew-In


Do you find yourself with a plastic fork or the end of a rattail comb scratching away at the braids under your sew-in? Drop the fork, and walk away. You may be causing more harm to your already irritated scalp. Don’t scratch with anything that will irritate your scalp more than it already is. With every harsh scratch, your scalp can get scabs causing damage and hair loss. The irritation or itch occurs because you generally don’t wash your hair as much while wearing weave or extensions. It might seem as if your scalp itches more than usual a week or so after adding hair extensions. Here is a harmless way to soothe your irritated or itchy scalp quickly, without disrupting your braids. Using a clean bottle with a nozzle attachment apply liquid hair oil directly to your scalp or try Dark n Lovely's scalp soother. It is also good to apply oil to your braids after washing and drying your hair. If you have questions or would like me to blog about a hair issue you are currently having, please leave your questions in the contact form on hairnparis.com

18 Aug '18

DIY Leave-In-Conditioner To Help Maintain Your Sew-in’s Freshness

DIY Leave-In-Conditioner To Help Maintain Your Sew-in’s Freshness

The most important product that I use on my hair, as well as my sew-in, is leave-in conditioner.  There are so many reasons for using leave-in conditioners that benefits the health of your hair. Leave-in conditioner, it's great for detangling hair and it continues to condition the hair after applying to your hair. Leave-in conditioner is great for refreshing your sew-in between washes and it's an awesome form of moisture, which keeps the hair smooth and smelling nice. It also contains protein to strengthen the hair which is extremely important for hair growth. I can go on FOREVER listing why leave-in conditioner should be your BFF. BUT…. I would rather teach you how to make it so you save a few bucks. The best leave-in conditioner is DIY, do it yourself. Since buying conditioner is something I do on a regular basis to go along with my shampoo. Why not just make the leave-in conditioner and save money?  I have three daughters and I go through leave-in conditioner like crazy because it is also the number one product that I apply to my girl's hair as well as my own. My husband even uses the leave-in conditioner on his beard, which leaves it smelling amazing. So since I go through a bottle of leave-in conditioner five times faster than the next person, I decided to learn how to make my own leave-in conditioner. Plus I can control the ingredients that I add to make my leave-in conditioner which makes it more natural and safer for my family. It is always best to know exactly what is in the products you are using, so that is another reason I love this method.

First, take some time to think about, what your hair needs and add the ingredient that helps with that issue to your leave in conditioner. Try not to go overboard with the ingredients that you add, just to keep things simple starting out. Do some research to become aware of what mineral help with different side effects before you begin your mixture. Once you get a feel for making the product and your comfortable you can start going more in-depth with what you add. To give an example, if you deal with dry hair or itchy scalp add a little liquid based oil to your mixture of ingredients, you could even add lemon juice that will help lighten the hair. However, for this blog, we will only use basic ingredients to make our DIY leave-in conditioner. 


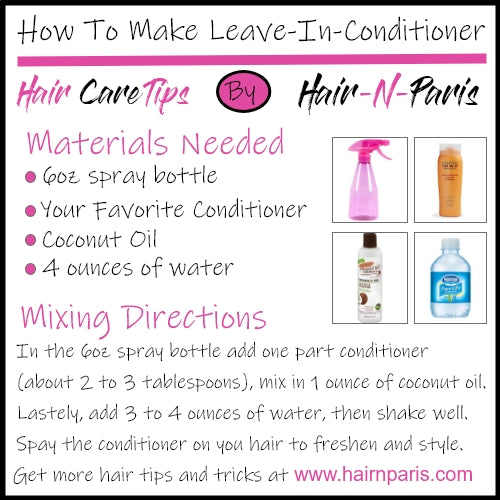
Basic Materials You Will Need For Making DIY Leave-In Conditioner

  • 6oz Spray Bottle
  • Distilled Bottled Water
  • Your Favorit Conditioner
  • Coconut oil (liquid or melted) 

Using your spray bottle mix about 2 to 3 tablespoons of your favorite conditioner. Next, add about 3 ounces of distilled water, this step is because you want to dilute the conditioner so that you no longer need to rise your hair. This method is what makes your regular rinse out conditioner a leave-in conditioner.

Now,  add about 1 ounce of coconut oil, which helps with faster hair growth and dryness. I use coconut oil because it is a natural way to help your hair grow thicker, longer, and faster.  The essential fatty acids and vitamins naturally found in coconut oil nourish the scalp and help to remove build-up. I also add Vitamin E because it is an antioxidant that helps repair and build tissue. This step is completely optional so I didn't include Vitamin E as part of the materials needed, which is something that is added to my leave-in conditioner mixture. Applying vitamin E will help repair damage and encourage hair growth, as well as apply shine. Make sure to shake the ingredients well so they mix together.

Now that you have your conditioner all mix and ready, apply to your natural hair as well as your sew-in bundles. Remember if your detangling your hair, spray on the leave-in conditioner and begin to detangle starting at the end of your hair. If you have questions please comment below. You may also read more hair tips by visiting my blog located at https://hairnparis.com/blogs/news. Thank you for taking the time to read and I hope you enjoy your homemade leave-in conditioner as much as I do.


01 Feb '17

Difference Between Closures, Full Frontals, And 360 Frontals

 All of the products shown and much more can be purchased at Hair-N-Paris

Lace Closure - Is an off circle shape of lace that has hair attached. It is usually pretty small and is around 4X4 in size. A closure can be used to place on the top of your braided hair in order to make your weave or sew-in look more natural. This allows you the option to have no real hair left out (leave out) when wearing a full head of weave. To have a full head sew-in with a closure you would want to purchase 3 or 4 bundles to complete a style.

Click Link To Purchase Closure Now

Lace Closure (4x4)  

Full FrontalIs an ear to ear stretch of lace that has hair attached. It is larger than a closure and is around 14X4 in size. A full frontal will give your sew-in a natural look. Unlike a closure you can be more diverse and wear a middle, side, or three part style. There are so many different styles that can be done with a frontal like braids along the front of the head, twisties in the front, and much more. This allows you the option to have no leave out, while having beautiful baby hairs when wearing a full head of weave. To obtain a full sew-in you would need about 2 to 3 bundles with the full frontal to complete a style. 

Click Link To Purchase Full Frontals Now


360 Frontal - Is a lace headband with hair attached to it. The 360 frontal recreates the complete hairline around the entire head. This frontal allows you to rock pretty much any hairstyle. With the 360 frontal, you no longer have to fear wearing the high ponytail that so many people love. You can pretty much wear any type of part in the front of the hair, along with being creative with the back. To do a full sew-in or weave, purchase with the 360 frontal you would need 2 to 3 bundles of hair. 

 Click Link To Purchase 360 Frontals Now


 Thank you so much for taking the time to read my blog. If you have any questions please comment or contact me.


31 Oct '16

Hair-N-Paris Products and Reviews

Hair-N-Paris offers 100 percent unprocessed, virgin hair. Our products comes in many different textures such as Malaysian, Peruvian, and Brazilian. We offer 6A to 8A grade hair in a wide range of lengths and styles. To learn more about the hair grade system, see our previous blogs. We provide shed and tangle free unprocessed virgin hair. However, due to high demand we have added Ombre hair to our store. We offer free fast shipping for all customers. All orders are delivered free of charge in 3 to 7 business days. Hair-N-Paris ensures our customers are receiving high quality virgin hair at a great price. I have attached a picture of what our product looks like before we add the logo tags and packaging. This blog is also being posted to encourage customer who have purchased from us to please leave a review. I take all customer concerns seriously and will attempt to address and correct any issues. So... please feel free to leave a review or ask any question. I will respond to any and all question or concerns. Thank you for taking the time to read this blog to better get to know Hair-N-Paris. If you have not yet placed your first order and are still unsure of our company, I would love to help.  "New Customers" enter coupon code Newbie for 20% off and free shipping.

19 Jul '16

DIY Extension Dying At Home

For those of you who like DIY hair dying, this blog is just for you.  If I can learn to do it myself, then I'm all in. Below are six very easy steps to dying your hair weave at home.

Materials Needed: Hair Extensions / Tracks Hair Dye or color, a brush, color bowl, plastic wrap, gloves, large towel, aluminium foil, and a wide tooth comb.

Step One - First, be sure to disentangle the extensions by combing through them with your wide tooth comb. Make sure that all product are completely washed out of the extensions before applying the color. Dry the extensions after disentangling and washing them by placing them on a towel.

Step Two -  Next, prepare the hair color mixture. Before proceeding with this step, ensure that your hands are well protected by wearing the rubber gloves. Follow the instructions that came with the hair color.

Step Three – Once you have followed the preparation instructions for mixing the hair color. Use the dye to coat your hair extensions. Comb through the extensions to ensure that the hair color is evenly distributed and coats all the areas you want dyed. Cover the hair extensions with aluminum foil once you finish applying the dye. Allow the color to set into the hair as noted on the color box.

Step Four – You will now be rinsing excess hair color from the extensions. For faster and complete removal of color, use warm water when rinsing the extensions. Once all the dye has been removed, shampoo the and apply a conditioner. You may want to comb through the extension gently while the conditioner is in the hair to straighten the hair. Allow the conditioner to rest for up to 10 to 15 minutes.

Step Five – Now that your extensions are colored. Rinse the conditioner out of the extensions using cold water. The cool water method will leave your hair shinny as well as seal in the color.

Step Six - Finally, air dry the extension, which will preserve moisture. If you would like you can also blow dry the extensions to speed up the drying process.